Add components to a form
A form component is one field or content block on a form, such as a text field, a date or a file upload. The Form Builder lets you add, edit and delete components, and set what each role can do with each one. This guide covers the fields that every component has. Each component type has extra fields of its own.
Who this applies to
- Audience: Configurators.
- Access required: The View and Edit permissions on the scheme.
- Assumed knowledge: The form has states and roles. Refer to Build your workflow: roles, states and form permissions.
Open the Form Builder
- On the scheme overview page, select the Versions card.
- Select Edit next to the form that you want to configure.
- Select Form.
Add a component
- Select a component from the component list.
- Fill in the component fields. Refer to the table below.
- Set the component permission for each role and state. Refer to Set component permissions.
- Save the component.
The preview in the right-hand panel shows the component as you build it. A component gets its position only after you save it.
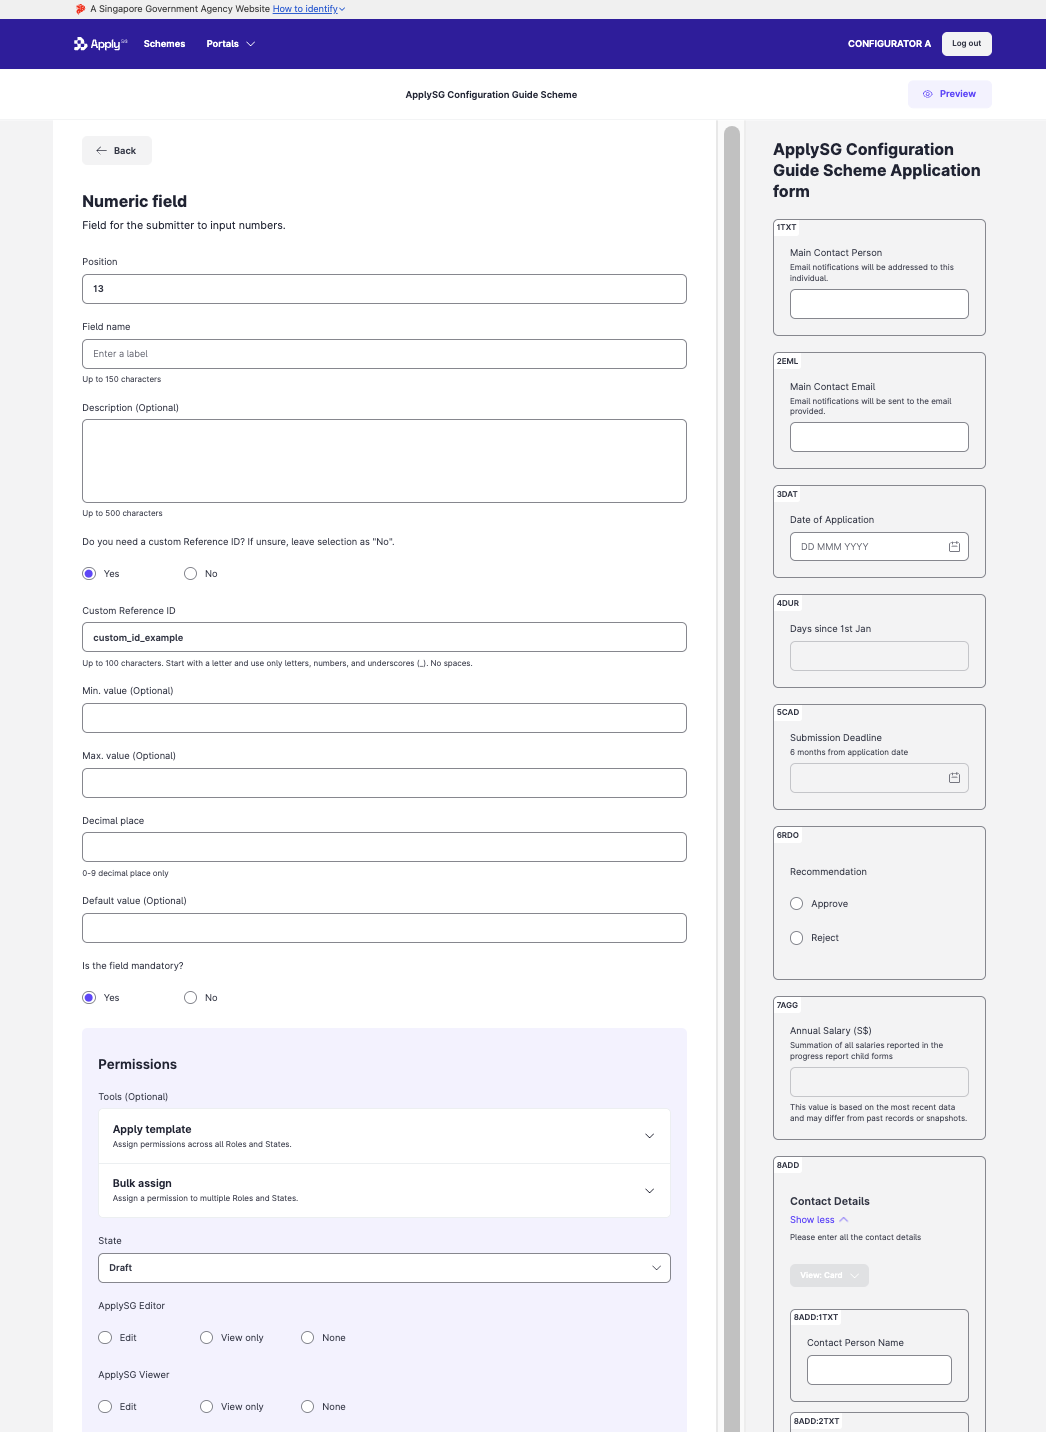
Component fields
| Field | What it does |
|---|---|
| Position | Sets the component’s place on the form. Enter a number to move it. The position joins the component type ID, for example 2TXT for the second component, a text field. |
| Field name | The name, label or question that applicants see. |
| Description | Optional. Helper text that explains how to fill in the field. |
| Custom Reference ID | An identifier that you can use in logic and integrations. Select Yes to enter your own: up to 100 characters, starting with a letter, with only letters, numbers and underscores. Select No and the system assigns a unique 16-character ID. You cannot change it after you save. |
| Mandatory | Sets whether the applicant must enter a value. |
| Permissions | Sets what each role can do in each state: Edit, View or None. |
Each component type adds its own fields. For example, a numeric field needs the number of decimal places, and a multi-selection field needs its options. Refer to Form components.
Use reference fields
A reference field copies a parent form field into child forms, so a value you update in one place stays consistent. Only fields on the parent form (the application) can be referenced in child forms. A field created in a child form cannot be referenced by another child form.
When you import child submissions, the parent submission is also updated if the scheme uses reference fields.
Constraints and limitations
| Constraint | Detail |
|---|---|
| Reference ID is permanent | You cannot change a Custom Reference ID after you save the component. |
| Reference fields | Only parent form fields can be referenced in child forms. |
| Addable set permissions | For an addable set, Edit means you can add and remove sets, and View means you can see sets without changing them. The fields inside a set have their own permissions. |
| New roles and states | A new role or a new state starts with no component access. |
| After publishing | You cannot change form configuration directly after publishing. Create a new version. Refer to Change a scheme after go-live. |
Related features
- Set component permissions: set access across many roles and states at once.
- Add form logic: show fields and messages based on inputs.
- Preview a form configuration: check the form as each role.
